The house that Kijiji built

An adventure renovating a home on a dime

D Day,….. Or is it?

Luckily, it’s not! My mortgage broker has out off the Appraiser till Monday. That buys me the weekend to finish up the trim and put a coat of mud on the drywall.

A lot has been accomplished in the last couple days. Quite amazing when you are pushed with a deadline.

Let’s start with the entrance.

We had planned a while back to do a built-in bench with an open closet and cubby’s

20140321-230209.jpg

20140321-230219.jpg

Now for the progress pics:

20140321-230313.jpg

20140321-230343.jpg

20140321-230403.jpg

20140321-230426.jpg

20140321-230445.jpg

20140321-230458.jpg

Still have to finish the top shelf, but I think that is pretty close to the original plans.

Also as of today, I’ve finished some of the trim going up the stairs

20140321-230728.jpg

20140321-230737.jpg

Next is the awesome part!
Stone work for the chimney.

We had selected already the stone, but I knew I wouldn’t have time to install it.

I brought another handy guy in to help. (Carmine caught a flu and is down for the week). My friend Andy Lavery,.. A garage door expert and handy guy.

We didn’t stack the stone traditionally with mortar and thinset. I decided to glue the stone with PL Premium. A sort of dry stack.

I think the chimney turned out awesome!

20140321-231144.jpg

20140321-231153.jpg

20140321-231203.jpg

20140321-231213.jpg

20140321-231233.jpg

20140321-231242.jpg

20140321-231253.jpg

I think I need to now make a custom rolling butcher block to fit better around the chimney.

You’ll notice that the stone steps out as it gets closer to the stove. There’s a reason for that.
Behind there is the gas shut-off for the stove. I built a removable box that covers the shut-off. It slides out.

I will tpo it with a piece of marble tile,… If I can find the stuff we used for the kitchen counters.

I’ll update with clean pictures sunday night!

Getting closer…

To the main floor getting finished!

While waiting to borrow a table saw; I hired a contractor friend for a bit to help finish drywall the stairwell and the upper hallway.

Carmine Manna – top 10 competitor on HGTV’s Handyman Superstar Challenge season 4.

20140319-021248.jpg

20140319-021302.jpg

After finishing most of the drywall, we decided to go pick up stone for the kitchen chimney,.. It was around 3pm and wanted to beat rush hour.

There was lots to choose from

20140319-021904.jpg

20140319-021921.jpg

20140319-021931.jpg

We ended up with buying the stone on the right

20140319-022035.jpg

Thanks to the inlaws, I have a table saw for a few months.
Now I was able to finish the last few sq/ft of flooring.

Why did I need the table saw? Well,… I need to cut a groove on the one side so I can create a stair nose for the top of the basement stairs.

20140319-022603.jpg

We have 2.5 boxes of flooring left,.. That’s approx 60 sq/ft of flooring. Stored in the basement for when we so upstairs.

With the extra wood, I made toe-kicks for all the kitchen cabinets.

20140319-022846.jpg

I also felt a little creative; we didn’t know what to do with the cold air return

20140319-023048.jpg

Just sitting there staring at it and looking at the extra flooring,.. I came up with a good idea.

20140319-023234.jpg

Next step is prepping the kitchen chimney stack for stone.

We put plywood around (mostly to hide a misc gas line that goes to the 2nd floor)

Then painted it dark gray (to simulate mortar); the stone will be glued to the stack with PL Premium (second strongest construction adhesive on the store shelves, strongest being PL 9000)

20140319-023630.jpg

20140319-023638.jpg

And started work on the entrance until I ran out of mdf for making the trim.

20140319-023735.jpg

20140319-023746.jpg

After picking up more mdf,.. I lost the motivation to continue.

So we picked up a used/new to us dining room set for $300 off of kijiji.ca

20140319-024337.jpg

Put the old set on kijiji.ca for free,.. Within 30 mins I had 3 people willing to pick it up right away,.. But not tonight,…. I’m tired!

20140319-024438.jpg

5 days left and counting….

The new appraisal is being ordered on Friday,.. Need to have the main floor finished and the upper hallway completed.

As of today:

Completed the kitchen floor and as I was working on the bathroom entrance (with approx 3 sq/ft left) my table saw bit the dust.

20140317-000500.jpg

20140317-000519.jpg

20140317-000559.jpg

Also completed: the stairs.

To carry on with work last night and not make too much noise: I completed the stairs.

Painting and adding a carpet runner.

20140317-000823.jpg

On the last face, you may be able to tell that I pieced parts of the runner together to make it look even as I made the 90* turn.

20140317-001255.jpg

1 step closer to completion.

Tonight I also finished the wiring for the end bedroom, the hallway and 2 outlets of the 2nd bedroom.

All that is left is the master (4 outlets and a light), the linen closet (1 light – pull switch) and the 2nd bedroom (3 outlets and a light)

5 days left….

New floors!

New floors have been in the plans for a very looooong time,.. To the point that steph talked about new floors every week,.. And then daily.

It was time!

We have been looking at different types of floor and different types of wood; we have kids,.. And now a dog. We have to be very careful on the type of wood and finish.

At first we looked at bamboo. It’s known to be very hard.

On the Janka hardness scale it score a 1450.

To put that into perspective:

Hard-rock Maple scores an 1156
Royal Mahogany scores 1400
Teak – 1075
White Ash – 1320

Bamboo was on our minds for a long time.

While always keeping an eye out for a good deal, I stumbled across a 5.25″ wide oak; hand scraped and wire brushed for that distressed look.

This was at Home Depot – Bruce hardwood floors

White Oak is quite comparable in hardness: 1333

We have a circumstance that requires us to have flooring installed within 10 days (starting 3 days ago) along with other unfinished projects.

I went to order this flooring and there was a 2-3 week wait for product delivery… Uh oh, time for a new hardwood.

Back to searching like a frenzy stephanie spotted Acacia,.. We looked further into where we can buy this and if it was in stock. Found a place called hardwood direct here in Calgary.

Easy guys to deal with and they had what we wanted in stock!

3.5″ wide, solid Acacia – walnut stained; hand scraped prefinished hardwood.

BTW: the Janka hardness for Acacia is 1750!!!
Pretty darn good!

20140315-013127.jpg

Score!

Right away, we were sold the instant we saw this wood. It was just right, like we were meant to have this wood!

Brought enough to do the main floor and got busy (all the while I’m working real estate in a crazy market!)

After 2.5 days,.. I finished the entrance, living room and dining room.
Just have the kitchen left to do.

20140315-013254.jpg

You can see, I had to level the floor at the front of the house. In the 102 years of its life. The front settled 3/4″

20140315-013414.jpg

20140315-013428.jpg

20140315-013440.jpg

20140315-013503.jpg

20140315-013517.jpg

20140315-013539.jpg

20140315-013553.jpg

Now that the front half of the house is mostly complete, I took a look at the very first computer generated plans I had before we even moved into the home.

I’ll repost those pictures here,.. The flooring is surprisingly similar.

20140315-013833.jpg

20140315-013848.jpg

20140315-013907.jpg

20140315-013920.jpg

20140315-013934.jpg

20140315-013947.jpg

And finally before I call it a night:

Steph found a beautiful new chandelier for the dining room.

400 crystals all neatly wrapped in chrome with 7 x 40w G12 bulbs

Pretty and stunning.

20140315-014201.jpg

20140315-014213.jpg

20140315-014226.jpg

Next,.. Kitchen floor!

Front door

The houses across the street from us have been bought by a developer.

They have been slated for demolition.

One of them had a really nice front door. Right before demo, I asked the developer if I could have it.
Sure enough,.. He let me take it.

Earlier on, steph found a great screen door.

These have been sitting in the back yard all summer.

We would’ve changed the doors out right away, but yet again another hiccup.

Our door is a 34″ door,.. The one we got and the screen door are 36″

With the nice weather in this part of the winter (chinook had come), and to continue the current trend of working on the house.
It was time to tackle the front door.

After 5 new sawzall demo blades (behind the siding is old stucco), 3 – 2×6’s, 2 – 2×4’s, 3 – 1×8’s, 3 – 1×4’s, some weather stripping and a new threshold, we have a new front door and screen door.

I still have some minor trim to do, but for the most part. The front door is finished!

20140112-000753.jpg

20140112-000804.jpg

20140112-000813.jpg

I hope you all enjoyed reading!

A little over due for an update!

This year has been a very busy year, and I am sorry for neglecting to keep you all updated!

Ok,.. so last I left you off I had completed my deck,.. well not really.

I neglected to get the proper building permits for the deck replacement. The city had come over and given a stop work order and ordered me to get permits or remove the structure.

A little hiccup. I built the deck very well, but the city needed proof. I had to get a structural engineer to examine the footings and write an approval letter to the city.

It was a long process. I had to do up multiple drawings of the existing deck, survey my land with the deck on it. Show drawings of what the deck looks like; show other properties in the neighborhood that had similar decks (so I wasn’t building something that wouldn’t ‘fit’ in the neighborhood)

I had to apply for a development permit first – because my house if non-conforming to today’s building/development codes (the house is built in 1912 – nothing would be conforming). Calgary by-law is that you cannot build a structure on a non-conforming building. So I had to also apply for a relaxation for my development permit.

Once that was all done, I was issued a development permit number and the city advertised in the paper: so that if there was anyone that was opposed to my deck could go to the city and complain.

After that process, the development and relaxation was approved; I could then go apply for my building permit for the deck. I had now acquired my building permit. I am required to put a railing on my stairs and then I can get an inspector over to finally approve the deck.

So far, the additional costs for the structural engineers letter, development permit with relaxation and building permit all came to approx $1100.

This chapter is not quite over, but I will wait till the snow has left the ground before I can finish. The building permit is good for 6 months.

So back to work inside the house: the Living room!

Steph had urged me to finish the living room before Xmas. I wasn’t sure if that was going to be possible, but complete it over the holidays was quite possible.

I had previously drywalled the whole living room, so it was now time to mud and tape it,.. while we are putting up Xmas decorations.

Image

You can see in the picture above that I had drywalled the ceiling and taped it.

After that I started making trim again. Fired up the table saw and cleaned off all the saw dust from last year.

On goes the trim:

Image

Image

Image

Image

And of-course after the trim went up, it was Xmas time!

Image

As soon as Xmas was over, it was back to work. We quickly packed away Xmas and I got back to work! Painting!

Image

Image

Image

Everything was jam packed into the dining room as I put up plastic, sanded the drywall, primed everything and painted the ceiling.

Image

Image

Image

Image

After all that hard work, we felt like going shopping and bought a new light for the livingroom.

Image

Image

It’s very bright.

On to Painting!!!

Image

The wall color is more cream than the yellow that it appears to be in the pictures.

Image

And finally set the livingroom back up and hang the TV

IMG_3567


IMG_3569 IMG_3570


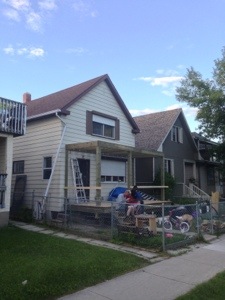
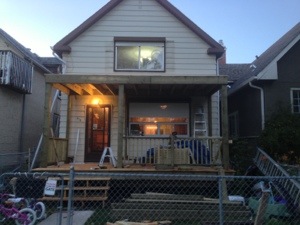
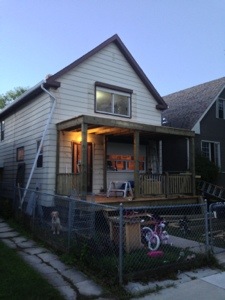
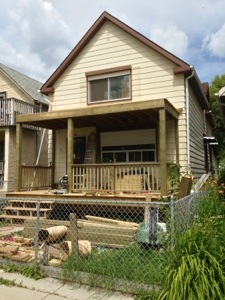
Front porch part 1

Onto our most recent and most expensive project!!

The front curb appeal!

Coming home was getting depressing. Looking at the front of the house was giving me NO motivation to renovate.
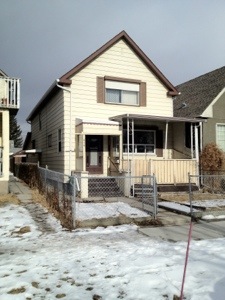
20130722-022945.jpg

It’s pretty ugly.

First step is to clean out the crap. I was so disturbed by the front I got right into ripping everything down just to start with a clean slate!

20130722-023132.jpg

With it looking like that, it sort of reminded me of an old picture we found of the house. I had posted this pic in an earlier post, but I’ll post it again here.

20130722-023231.jpg

With the old crappy porch gone, we are now on thinking mode of what we want the ‘new’ house to look like! What we are planing to do will not only re-vitalize the house, but the neighborhood too!

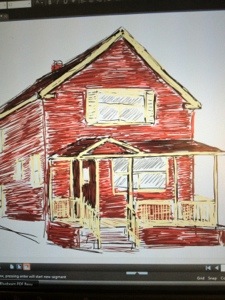
Here is an original concept I drew up over a year ago
20130722-023430.jpg

We had scrapped it once we both decided that we wanted a deck off the master. So back to the drawing board.

The next concept is what follows:
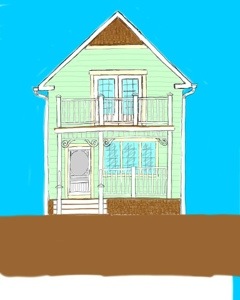
20130722-023758.jpg

Don’t think about the colors, those are yet to be determined.

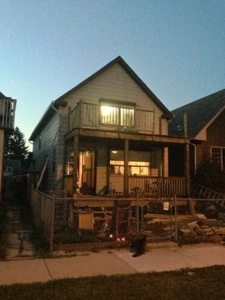
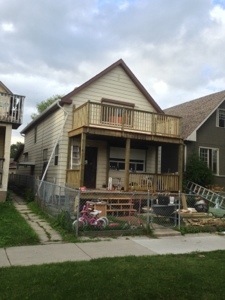
There is the sketch for our 2 storey porch!

Time to build our most expensive project to date! And biggest!

It starts with a proper foundation.

For a 2 storey deck/porch, a 10″ diameter, 4′ deep concrete pile must be in place. At least 2 of them.

The decks I’ve seen in all my career have been built with 2×8’s with a triple 2×8 beam holding up the deck.

A good friend of mine who is a contractor gave me some fantastic advice.

Dig 3 support holes; use only the top 12-24″ of a concrete form. This way the concrete will form a tight fit to the hole and will “grab” the earth better should lifting from freezing happen.
The frost line here is 3′
He also suggested using a 12″ tube. This way the non-tube part of the pile will end up being the proper 10″ with a tight form to the hole.

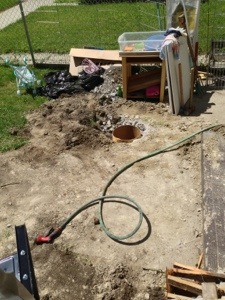
I bought a post hole shovel and spent the afternoon digging!
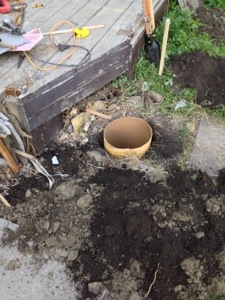
20130722-024605.jpg

20130722-024622.jpg

20130722-024643.jpg

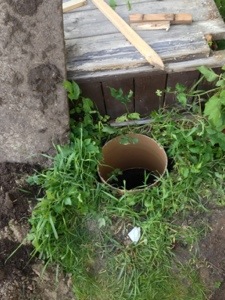
To finish the 3rd hole, I needed to break the 60 yr old concrete sidewalk. Thought it would be easy with a 20lb sledge, but I was wrong. The flipping walk was 8″ thick!!! Thankfully the use of rebar was not practiced back then.

Went to Home Depot and bought more concrete. Thankfully they got another larger order. To be on the safe side, I took extra to finish my rear walk in the back yard.

Each pile took 5 bags of concrete!

20130722-025048.jpg

I know, I know; some of you might be thinking – “those piles should be out of the ground about 4-6″ so snow doesnt pile up against your main support and rot it out”

Rest assured, the whole deck will be skirted (before winter) so no chance of rotting support.

Once the concrete had cured, its time to start building!

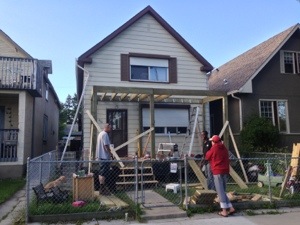
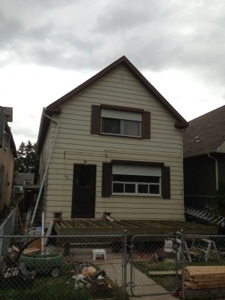
2×10 ledger board is attached to the house with 8″ – 3/8″ galvanized lag bolts (via impact gun).

Then a triple 2×10 main beam on 6×6 supports over the concrete piles I poured.

With joist hangers I frame up the main deck with 2x10s.

The deck will be 8′ deep and a hair over 17′ wide. Steph was worried the deck might be too big, but I had started already and couldn’t change it.
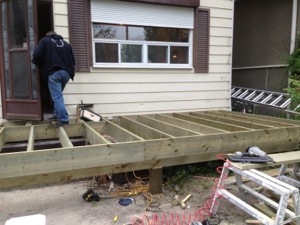
20130722-025729.jpg

20130722-025802.jpg

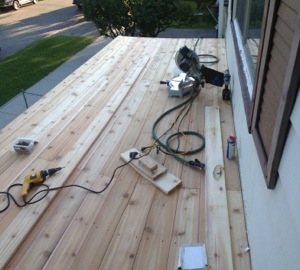
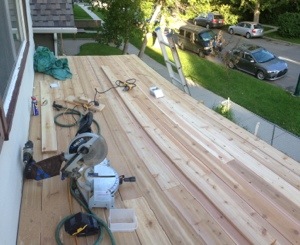
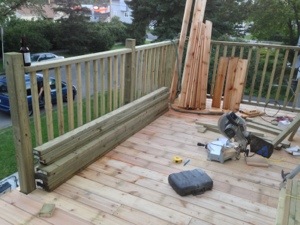
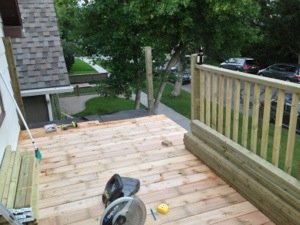
The deck top material we chose is a 1×6 cedar. Smells awesome when its cut and when it’s wet. That wood is beautiful!
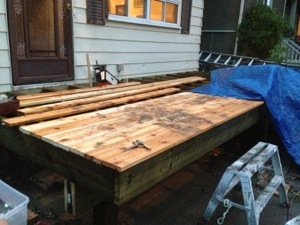
20130722-025920.jpg

Next is stairs!

I measured the hight, divided by 7.5″ and came up with the number of steps I needed. But to be more accurate on rise, I took the number of steps I averaged out and divided that into the height of the deck. Now I had the proper rise (which ended up being approx 8″) for the number of steps we wanted. I also wanted a nice deep tread; so I cut the tread part at 10″ so I can have a 11-12″ step.

I cut 4 stringers from left over 2x10s to make a 5′ wide staircase.
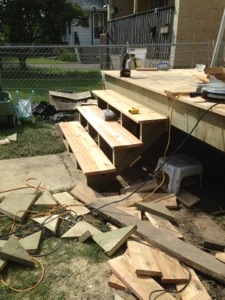
20130722-030357.jpg

I will have to pull the steps off to skirt the deck later, so they are not completely finished.

Total cost of the front porch at this point is approx $1100 in materials.

This was the end of weekend #2 (first weekend was digging the holes and pouring the concrete piles)

Onto week 2 and weekend #3.
The second level was to start! The neighbors had some hired help the day before. The offered to give me a hand to get started on the second level for just $40 and a case of beer!
Deal!! I took them on!
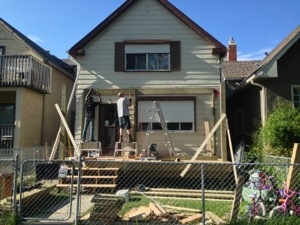
By the end of day 1, the 2nd level was all framed up!
2×10 ledger lag bolted to the house just like the main deck.
3, 6×6 solid beams and support posts that sit directly on top of the triple 2×10 main beam. ( I had cut out 6×6 squares of the cedar deck to insert the 6×6’s right onto the main beam)

We used 2×4’s to steady the 6×6’s level-straight while we framed up the second level
20130722-031230.jpg

20130722-031348.jpg

20130722-031406.jpg

20130722-031417.jpg

What an amazingly productive day!

The following day was topping it with cedar deck boards.

The depth of the upper deck is only 7′ as opposed to the lower deck that is 8′.

20130722-031528.jpg

20130722-031547.jpg

20130722-031559.jpg

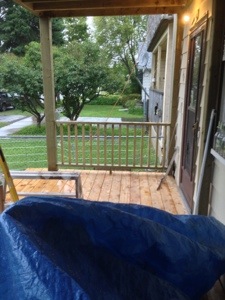
I’m excited as its now passed the halfway mark and I can start the railings!
20130722-031926.jpg

20130722-031940.jpg

20130722-032004.jpg

20130722-032014.jpg

20130722-032028.jpg

20130722-032043.jpg

Rain….. Changing things quickly!

The following day it rained,.. A lot.
I realized how much a hated water dripping on my head, while under my porch…….

I’m glad it did before I started the upper railings.

I ripped up the deck and made it more waterproof!

It was an additional $300 in material, but well worth it!!

1/2″ pressure treated ply, then an all weather roof underlayment, and cedar decking on top.
The cedar is cut and laid front to back with a small gap (1/16″) as a channel for water to flow.

Both decks I designed with a slight grade away from the house. An approximate 1/2″ slope from back to front.

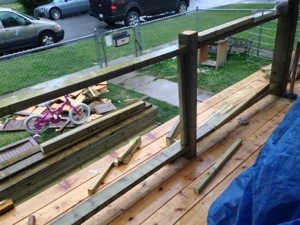
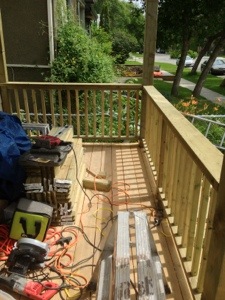
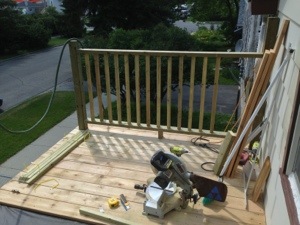
Railing we kept traditional and simple made with all pressure treated 2x4s and 2×2 pickets. Capped with a 2×6 to rest your drinks on!
20130722-032851.jpg

20130722-032901.jpg

20130722-032911.jpg

20130722-032924.jpg

20130722-032938.jpg

20130722-033000.jpg

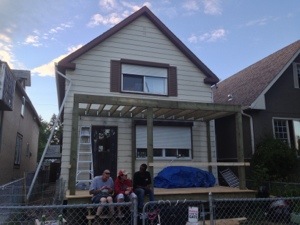
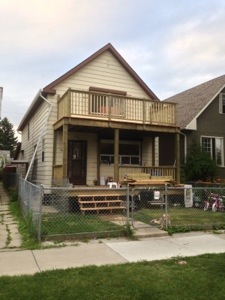
And at the end of weekend #3, my blog is up to date, I’m super tired and loving how the deck turned out!!

Tested the deck by hosing it off for 30 mins,… Not a drop seeped through!!

Supposed to have some thunder showers this week,.. Can’t wait to test out the deck and sit outside during!

I cleaned up the yard, mowed the 3 week growth of grass (that wasnt covered with piles of wood, end cuts and empty beer bottles/cans).
Proudly staked out “century home” flag into the ground and called it a day!
20130722-033309.jpg

Don’t worry the porch isn’t done yet!

I still need to put on a facia piece on the front of the upper deck (to cover the baluster joints – I don’t like the look of the lag bolts, although it does signify strength), the some kind of trim to give a bit of detail.

Trim the bottom of the 6×6’s with a 3.75″ board,.. Not sure if I want to buy trim or cut down some left over deck material.

Skirt all around the deck

Finish the stairs with railings

Wire in pot lights under the deck and steph would like a nice exterior chandelier right over the front door.

I’ve also thought about running another exterior outlet to the upper deck – unfortunately that would be switched with the front porch lights. Or, I could just punch a small hole when i re wire the master during that Reno,…. Sometime later.

We are going to cedar shake the peak (probably top 4 or 5 rows), and cedar shake the main deck area of the front of the house.

Cant forget to mention: install French doors off the master to the upper deck – which I have found on kijiji for $100 and should be picking them up tomorrow!

Next weekend is installing French doors off the master to enjoy the mornings and evenings!

Not sure what to do about a bug screen yet.

FYI: material cost to date is sitting approx. $2700.

I think I need to stop counting as I feel the pain in my wallet just looking at the number I just typed out…..

Just need to keep thinking to myself,.. If I had hired a company to do this,.. I would be well over 10k for the finished porch!

New Closets for us

While steph was on her weekly shopping spree’s she noticed ikea was having a sale on closets. $79 for a 3 door closet!
Hot dayum! She picked up 2; one for her and one for me!

We have been living out of portable closets for over a year now. This was a perfect upgrade!

The model is called DombÃ¥s; sure looks like Dumb-ass to me. Maybe that’s why they had a sale on them? To get rid of the stock.

The instructions sure make you feel like a dumb ass

20130722-022504.jpg

20130722-022524.jpg

20130722-022537.jpg

After an afternoon and eve, the end result is fabulous!

20130722-022624.jpg

Back Yard

As the weather gets warmer, we get the desire to hang out in the back yard.

Out if the blue is was demo time for the entire back yard.

Not sure how it happened.

Started moving some old concrete slabs to the back alley to give away (which I had successfully done in less than 24 hours with kijiji)
I probably should have charged at least for a case of beer.

Anyways, the next thing I know; my future brother in law was digging up dirt, my father in law is ripping down old wood and I’m renting a roto tiller.

Steph bought a concrete mold off kijiji last year for $30 and this was its time to shine.
1 bag of concrete at a time, mixed then placed and the back patio starts.

20130722-013624.jpg

20130722-013649.jpg

20130722-013707.jpg

20130722-013734.jpg

20130722-013801.jpg

20130722-013822.jpg

20130722-013849.jpg

It was extremely painful mixing 1 bag at a time but a carried on till a Facebook friend offered a concrete mixer! I gracefully jumped in the expedition and raced across the city to get it!
What a godsend that was! I can now effortlessly mix 2-3 bags as a time!

20130722-014212.jpg

20130722-014236.jpg

20130722-014253.jpg

Ok so it really didn’t happen as spontaneously as I stated earlier. Now is when the family randomly showed up and we went to town on the back yard!

It almost felt like we were on a back yard make-over show!

While ripping up the back yard, my father in law pulled off the wooden step into the garage, we found a bee hive.
All last year, I watched the odd little black bumble bees fly into my garage and disappear. This is what those little guys were doing

20130722-014707.jpg

During the back-yard make-over, we popped into the local Home Depot to rent a roto tiller to clean up the back yard a bit; lucky for us, this is the first year they decided to carry sod.
Cheaper than anywhere else we have seen too!

20130722-014905.jpg

While the guys finished cleaning out and tilling the yard, I finished the concrete patio.

We thought it might be a good idea to personalize the patio as well. We picked the side entrance area to write in the concrete!

20130722-015146.jpg

20130722-015206.jpg

20130722-015219.jpg

20130722-015235.jpg

20130722-015253.jpg

20130722-015307.jpg

After all that, we returned the roto tiller and bought sod! Lucky for us there was still some left.
After 2 days, 2/3’s the sod Home Depot had was already sold!
We only needed 400 sq/ft.

20130722-015503.jpg

20130722-015517.jpg

20130722-015534.jpg

I didn’t finish the walk to the alley because Home Depot ran out of concrete! Busy Reno year here in Calgary!

I have since picked up more concrete from another project (which will be in one of the next blog posts), and purposely picked up extra to finish the walk.

Steph loved how the backyard was becoming we ended up with a few more additions!

Thanks to the in-laws for a brand new BBQ!!!
I helped them find a wonderful new home and they thanked us by purchasing a new BBQ!

20130722-020100.jpg

With all the excitement, steph bought some patio lanterns 🙂

20130722-020207.jpg

The neighbors are fantastic so we both decided on a neighborly gate between the properties!

20130722-020410.jpg

You are all thinking that we are crazy for installing a neighbor gate,.. Let me tell you all that we were drinking copious amounts of beer and it turned out great! Here is the best reason for the gate: the neighbors have a dog; 1/2 black lab, 1/2 Newfoundlander who recently lost his friend.
We have a new golden retriever who needs to socialize and learn.

20130722-020852.jpg

20130722-020923.jpg

20130722-020954.jpg

20130722-021030.jpg

20130722-021049.jpg

20130722-021109.jpg

His name is Harlem (the kids named him) and he is awesome!!!

Why on earth have we not had a dog sooner!

Just like another kid! He has grown so much in just 4 short months! I love my dog 🙂

Main floor bathroom

Main Floor Bathroom

It’s about time I catch up on this blog!!

Many distractions have happened during my absence from blogging.

Temporary watch fetish, becoming an uncle again, new puppy, moving up in my career, unrelated health issues with family and etc.

But you guys don’t want to hear about that. In fact, I’m sure you don’t want to read much more than I do. So I’ll get on with pictures!

Starting with framing up to hide the sink and tub plumbing stack.

20130722-010513.jpg

We got a brand new pedestal sink from a friend, who had never used. He bought it as a discontinued model from a local hardware store.

Unfortunately it must’ve got bumped around a little and the base had split.

For now I used construction adhesive and put it together, just so we have a working bathroom.

20130722-010523.jpg

Putting up the drywall

20130722-010530.jpg

20130722-010539.jpg

20130722-010547.jpg

20130722-010556.jpg

Laying down some tile we got for free. We were given just enough to do this floor. I was happy it kinda matched what we put in the upper bath; almost the same color and pattern.

20130722-010609.jpg

Because of the distractions, the bathroom sits like this today.

Stay tuned,.. More catchup posts to come shortly!

Design a site like this with WordPress.com
Get started